1. Correct die numbering. Die, suffix, backing, pad, and feeder board numbers are crucial. Incorrect numbers on the die could indicate assembly and operational errors, leading to significant problems. Date and supplier ID are also required. Modern factories use laser-engraved computer identification codes.
2.Inspect for metal shavings or chips from the manufacturing process. These tiny metal shavings can hide in the die's weld chamber or working zone and may form die lines in the extruded product.
3.Check the die and related tools for Rockwell hardness standards. While most die manufacturers perform thorough checks, a difference of a few Rockwell C points is not impossible.
4. Tool diameter, thickness, and step dimensions. Better safe than sorry. Checking tool dimensions prevents tools from getting stuck in the die ring or becoming loose, leading to misalignment and/or aluminum seeping into unwanted spaces, butt shear forces impacting the tool surface, etc.
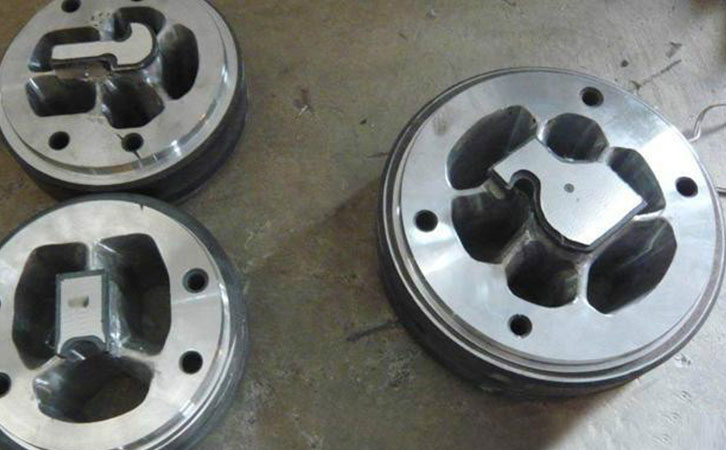
5. Pin arrangement of the die opening. This will tell you how much tool deflection is on the die, which is very useful for future dies. It will provide accurate information to zero the minimum weight per foot, thus allowing for the maximum weight of each die.
6. Support tool clearance. Check for obstructions in the backing, pad, sub-pad, and pressure plate openings. It is best to grind some clearance, which will reduce the possibility of clogging and/or potential damage to components.
7. Proper support for cantilever, etc. Ensure that the backing and supports are properly supported to eliminate tool deflection as much as possible and minimize the chance of tool breakage.
8. Proper exit dimensions: Check that the steps behind the working strip have adequate clearance. Key tongues, screw bosses, etc., should have a minimum clearance. Excessive clearance can cause the mold to collapse and be scrapped. A clearance of approximately 0.040 inches (0.10 mm) is considered normal.
9. Proper mold support: Maximum support is desired on the tongue for best results. Zero-degree taper is typically required in areas with small or long tongues and screw bosses.
10. Working strip finish: Check the mold working strip for: Wire cutting marks, scratches from files, gauge pins, or emery paper. Scratches caused by transportation. Burrs on the exit side of the working strip from EDM or milling embossing. It's best to grasp one of these points and check it before sampling or attempting a batch extrusion order.
11. Working strip flatness and perpendicularity: The importance of these cannot be overstated.


 Address : NO.7 Huihe Road, Qianzhou Industry park, Huishan District, Wuxi City, China


 IPv6 network supported